Categories
Nigerian News

WP themes For Beginners

This is WordPress themes How-To For Beginners Tutorial – By Momizat

WordPress themes can be used for both simple and complex websites. In our WordPress tutorial we have tried to cover all the basics and few advanced topics.

usability and customizability are the main reasons people regard WordPress so high. Another reason is the huge array of themes available for WordPress – you can create almost WordPress themes

The Most Common Questions Answered in our WordPress Tutorial

The Most Common Questions Answered in our WordPress Tutorial

Download the WordPress installation package

To start the installation process, first you need to download WordPress from it’s official download page. We recommend that you always download and install the latest stable version of WordPress.

Once you click on the Download button for the latest WordPress version, the installation package will be saved to your hard disk. Locate the installation package that you’ve just downloaded and extract it to a new folder.WordPress themes

Upload the WordPress Files to Your Server

Now, you need to upload the extracted files and folders to your web server. The easiest way to upload the installation files is via FTP. For detailed information on how to upload files via FTP, please check our FTP Tutorial.
[quote font=”verdana” font_size=”14″ font_style=”italic” color=”#474747″ bgcolor=”#F5F5F5″ bcolor=”#dd9933″ arrow=”yes” align=”centre”]This Demo Content Brought to you by Momizat Team [/quote]
Create a MySQL Database for WordPress to use

WordPress themes How-To For Beginners Tutorial – Momizat


Now, you need to create a MySQL database and assign a user to it with full permissions. For detailed instructions on how to do that, please follow the steps described in our tutorial on How to Create MySQL Username and Database. WordPress themes Once you create your MySQL Database and User, make sure you write down the database name,WordPress themes database username and password you’ve just created. You will need those for the installation process.

That’s it!Your new WordPress themes application is installed. You can use the Login In button to access your administrative backend and start posting in your new site.WordPress themes

WordPress themes


[quote font=”verdana” font_size=”14″ font_style=”italic” color=”#474747″ bgcolor=”#F5F5F5″ bcolor=”#dd9933″ arrow=”yes” align=”centre”]This Demo Content Brought to you by Momizat Team [/quote]

[review]
Categories
Nigerian News

Master WordPress themes

WordPress themes Master Tutorials : How do you start with WordPress? How so you master it properly and become an experienced user? Where do you find professional WordPress tutorials that will answer all your questions? This post will come in handy for all of you who have asked any of the above questions. A compilation of WordPress tutorials is a useful set for beginners who want to master this CMS, and advanced users who will certainly find some new and professional tips in them

WordPress Tutorials

WordPress as a seamlessly customizable and easy to use platform is highly estimated and powers 23.1% of all sites on the web. It’s amazing, isn’t it? Being completely free, offering a wide range of features, providing its users with millions of professionally made skins , it turns out to be a great choice for a number of websites. It can be various blogs, portfolios, even shops (using the WooCommerce plugin on WordPress website).

Choosing this software, you’ll never doubt the power of your site, because the WordPress community is always ready to offer plugins and anything else you may need to enhance its functionality. Some of them are free of charge, others are available for a reasonable price. How to deal with them or how to implement on the site, you’ll learn from these tutorials.

When you start working with WordPress, things can get confusing, but a good tutorial will be helpful. After checking them out you’ll be able to get to grips with this CMS and start any site you need. So, here is a collection of the best 15 WordPress tutorials that will boost your skills. Start with them, work thoroughly, and you’ll certainly master this CMS.

Helpful WordPress Tutorials for Beginners

WordPress How-To For Beginners
Here is a complete guide that provides you with instructions that you may need when start out managing a site on WordPress.

How to Create Your Very First WordPress Plugin
Any user faces a lot of questions when it comes to creating a WordPress plugin for the first time. This tutorial will show how to do it quickly and correctly.

How to Code a WordPress 3.0 Theme from Scratch
Coding a WordPress theme from the ground – this is what you’ll learn after reading this tutorial. You’ll also be able to take advantage of all of features of its 3.0 version. As a result you’ll get a blogging-ready minimal theme.

Create An eCommerce WordPress Website In 3 Hours
If your goal is to start an eCommerce site on WordPress, watch this tutorial and get the complete information on how to set up such a site in less than 3 hours.

How To Learn WordPress in a Week
Completely free tutorial on how to master the major points of WordPress. Good for beginners and intermediate users.

Mastering The WordPress Visual Editor
Welcome to a comprehensive guide for beginners who want to learn more about WordPress. By the way, even experienced users will find some interesting facts they haven’t faced before.

WordPress Cheat Sheet
WordPress shortcodes are known to be one of its most essential features that facilitate the users’ work. Learn the list of them in this useful cheat sheet.

WordPress Lessons
The best way to start with WordPress is to check out the guides and tutorials presented on the official site of this CMS. Here you’ll find whatever you need to become a WP guru.

The WordPress Community Offers Advice To Beginners
If you’re a WordPress newbie, professional advices from the official community will help you to advance your skills.

[quote font=”verdana” font_size=”14″ font_style=”italic” color=”#474747″ bgcolor=”#F5F5F5″ bcolor=”#dd9933″ arrow=”yes” align=”centre”]This Demo Content Brought to you by Momizat Team [/quote]

this is tags and keywords : wordpress themes momizat Tutorial wordpress templates

Build a Business Website in One Hour
Here is a good start for all of you who are looking for information about building a site on such a powerful CMS as WordPress.

WordPress Essential Training
After watching this video you’ll be able to create/publish posts and pages, customize a site with themes, widgets, menus and implement plugins.


Create Your Own WordPress Toolkit
If you want to enhance your website based on WordPress, do it by means of implementing plugins. Learn about the most powerful plugins.

4 Brilliant WordPress Techniques You Need to Know
Read this tutorial attentively and learn how to improve your WordPress website with the latest development techniques.

The Ultimate Designing Guide for WordPress Website
What are the main design principles you have to focus on while creating a WordPress website? Check out this ultimate guide to find them out.

[quote font=”verdana” font_size=”14″ font_style=”italic” color=”#474747″ bgcolor=”#F5F5F5″ bcolor=”#dd9933″ arrow=”yes” align=”centre”]This Demo Content Brought to you by Momizat Team [/quote]

wordpress themes momizat Tutorial wordpress templates

[review]

Categories
Nigerian News

Interview with John Doe

Momizat: In mi sem, sollicitudin eget ligula non, elementum venenatis purus. In velit ligula, pharetra eget odio et, dapibus semper nisi. Curabitur lacinia aliquam justo, a aliquam leo dapibus quis. Proin suscipit nibh.

John Doe: Morbi non diam non enim suscipit posuere ultrices interdum enim. Vivamus vitae leo in mi scelerisque dignissim. Maecenas semper semper tortor, at gravida augue interdum ut.

Momizat: In malesuada enim vel arcu dignissim elementum. Ut auctor elit massa. Phasellus sem risus, dignissim at nunc quis, sagittis fermentum magna. Donec lorem eros, faucibus non dolor ut, elementum placerat dolor.

John Doe: Quisque pharetra nibh massa, nec aliquet orci suscipit at. Ut id volutpat lectus. Phasellus dictum lectus vel interdum suscipit. Nullam ut ante eget erat imperdiet placerat.

Momizat: Donec a quam ut lorem ornare malesuada. Etiam eget bibendum purus. Duis fringilla mauris dui, eu elementum tortor pellentesque ut.

John Doe: posuere mi et dolor fringilla venenatis varius eu orci. Morbi interdum laoreet dui eget volutpat. Curabitur lobortis pharetra imperdiet. Curabitur ullamcorper viverra justo sit amet gravida. Vestibulum et sapien hendrerit, pulvinar velit id, interdum lectus. Etiam eget tortor at neque molestie feugiat quis sit amet arcu. Morbi at condimentum arcu, ac dictum risus. Lorem ipsum dolor sit amet, consectetur adipiscing elit. Aliquam vitae tellus diam. Fusce ac interdum massa, vestibulum pellentesque metus. Fusce laoreet mattis sagittis. Nullam iaculis lacus et tincidunt lacinia.

Momizat: Aliquam fringilla dui eu vulputate accumsan. Nam ut nisl enim. Aliquam non leo nec magna tincidunt tincidunt a quis orci. Nunc augue leo, imperdiet et nisl nec, auctor mattis enim.

John Doe: WordPress themes is the most used and popular blogging platform around the web. Its flexibility, usability and customizability are the main reasons people regard WordPress so high. Another reason is the huge array of themes available for WordPress – you can create almost anything, from online magazines to advanced e-commerce businesses. You can either get themes for free or pay for them. Of course, you get what you pay for — yet don’t be too eager to spend your money on something you might not even need. If you’re just starting out with WordPress I suggest reading Choosing a WordPress Theme: Free or Premium? After that you might consider whether you really want to pay for that premium theme. If the answer is no, continue reading and check out these 80 professional, beautiful and free WordPress themes from 2012 — the best free themes that can be found![quote font=”verdana” font_size=”14″ font_style=”italic” color=”#474747″ bgcolor=”#F5F5F5″ bcolor=”#dd9933″ arrow=”yes” align=”centre”]This Demo Content Brought to you by Momizat Team [/quote]this is tags and keywords : wordpress themes momizat Tutorial wordpress templates

Categories
Nigerian News

Add Pay With a Tweet Button for File Downloads in WordPress

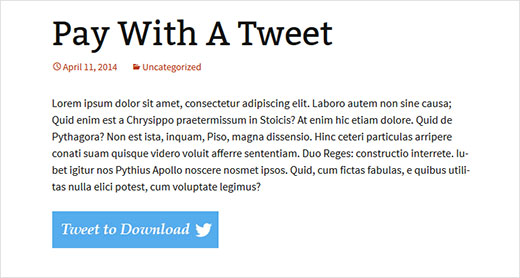
Have you come across sites that require you to tweet before you can download the freebie? If you offer file downloads on your WordPress site, then you too can add this pay with tweet feature to your site. It allows users to get the freebie and spread the word at the same time. A win win solution for all. In this article, we will show you how to add pay with a tweet button for file downloads in WordPress.

Pay with a Tweet preview

Video Tutorial

If you don’t like the video or need more instructions, then continue reading.

First thing you need to do is download and install the Pay With a Tweet plugin. Upon activation, you will need to go to Pay with a Tweet » Configuration and configure the plugin.

To use Pay with a Tweet plugin, you will need to create a Twitter App and then add your consumer key and secret key on this configuration screen. Don’t worry we will show you how to create a Twitter App and obtain these keys.

Creating a Twitter App

To create a Twitter App for Pay with a Tweet plugin, visit Twitter Developerswebsite. Sign in with your Twitter username and password, and then click on your account name on the top right corner of the screen. A flydown menu will appear, and you need to click on My Applications to proceed.

On the next screen, you need to click on create new app button.

Twitter will now display new application form. You need to provide an application name and description. In the website URL field, enter the URL of your website where you will be using this app. In the callback URL, you need to enter the callback URL shown in Pay with a Tweet plugin’s configuration screen. Lastly, you need to agree with the terms of service and click on Create your Twitter application button.

Twitter will now create the application and redirect you to the app dashboard. There you need to click on the Permissions tab to change the application permission. By default, newly created apps have read-only access, you need to change it change it to Read and Write.

After saving your new application settings, you need to click on the Test OAuth button. You will find your consumer key and consumer secret keys which you need to copy and paste in Pay with a Tweet’s configuration screen.

Adding File Downloads

Now that you have configured Pay with a Tweet plugin. The next step is to upload the file users will be able to download after the tweet. To do that, you need to go toPay with a Tweet » Upload Files and select the files you want to upload.

Once you have uploaded your files, they can be managed from Pay with a Tweet » Manage Files screen.

Creating Your Pay With a Tweet Button

To create your Pay With a Tweet Button, you need to click on Pay with a Tweet » New Payment Button. Enter a title for your payment and then add the tweet you want users to send when they click on the payment button.

The third option on the screen is to add a button image. This button image will be used to display your button. Click on the choose file button to add the image to upload.

After adding the button image, you need to select the download which users will receive once they send out the tweet. The file you uploaded earlier will appear here and you can select it. Lastly, you need to click on Create Payment Button to make this button live.

Adding the Pay With a Tweet Button To a Post or Page

After you create your button, you can see and manage all your buttons on Pay with a Tweet » Manage Buttons screen. You will see a shortcode next to the button you just created.

To display your Pay with a Tweet button in a WordPress post or page, you need to copy this shortcode and paste it into your post/page. Once you publish your post, your users will be able to pay with a tweet to access the file download.

Since this will likely bring a lot of new users to your site, it’s time for you to prepare yourself and convert those visitors into subscribers and customers. If you have not already done so, then start building your email list, ask your users to sign up (seehow we grew our email list by 600%). Make sure users can follow you on Twitterand promote your content to their other social networks (we use floating social barfor that).

We hope that this article helped you add a pay with a tweet button for file downloads in WordPress. If you found this article useful, then join us on Twitter orGoogle+.


from : http://www.wpbeginner.com/plugins/how-to-add-pay-with-a-tweet-button-for-file-downloads-in-wordpress/

[quote font=”verdana” font_size=”14″ font_style=”italic” color=”#474747″ bgcolor=”#F5F5F5″ bcolor=”#dd9933″ arrow=”yes” align=”centre”]This Demo Content Brought to you by Momizat Team [/quote]

this is tags and keywords : wordpress themes momizat Tutorial wordpress  templates

Categories
Nigerian News

Customize Twenty Fifteen With Typecase

The new WordPress default theme, Twenty Fifteen, looks great and provides a lot of flexibility, but one thing it lacks is the option to customize fonts. A free plugin called Typecase, by UpThemes, solves this problem by giving users easy access to over 650 different fonts.

Typecase uses the Google webfonts library, which has slowly increased in the past few years, making it a popular resource among theme developers.

Getting Started

Start by downloading and activating Typecase from the WordPress plugin directory. After it’s activated, look for the Typecase admin menu. While on the settings screen, scroll to the bottom and browse through the list of available fonts. You won’t be able to apply fonts through the Theme customizer unless you select a few font families.

Typecast Configuration Page

After you select a few fonts, click the save button. Browse to the customizer via Appearance > Customize and select the Theme Fonts panel.

Theme Fonts Panel

From here you’ll be able to assign fonts you selected in Typecase to various elements of the site such as, the sidebar, content, site title, site description, etc. Once you find a font that you like, click the Save and Publish button to see the changes on the live site.

Beyond The Customizer

If you’d like to assign a font to a specific CSS Selector, you can add one from the Typecase settings page. This enables you to customize fonts for any theme without writing code or modifying your theme in any way.

Typecase CSS Selectors

Add Typecase Support to Any Theme

Typecase has built-in support for every default theme since Twenty Ten. However, if you’d like to add support to a custom theme, you’ll need tofollow these directions as it involves adding a few lines of code.

If you’re using any of the default themes available for WordPress, Typecase is an easy way to expand the customization options available to you. With over 650 fonts to choose from, the hardest part of using it is deciding which ones to use.


from :http://code.tutsplus.com/tutorials/creating-child-themes-for-your-wordpress-theme-framework–cms-21933

[quote font=”verdana” font_size=”14″ font_style=”italic” color=”#474747″ bgcolor=”#F5F5F5″ bcolor=”#dd9933″ arrow=”yes” align=”centre”]This Demo Content Brought to you by Momizat Team [/quote]

this is tags and keywords : wordpress themes momizat Tutorial wordpress  templates

Categories
Nigerian News

Menu Customizer Now in Development for WordPress 4.2

WordPress 4.1 was released just yesterday, but core contributors are already planning and working towards 4.2. The Menu Customizer feature plugin is back in development and contributors are hoping to have it ready for inclusion in 4.2. Nick Halsey, who originally started the Menu Customizer work as part of his Google Summer of Code project, will be leading the effort to get the feature prepared for the upcoming release.

During the last release cycle, Halsey was focused on improving the Customizer API in core to add dynamic and contextual controls, sections, and panels. The Menu Customizer plugin has now been updated to be compatible with WordPress 4.1 and is ready to pick up development where it left off. As it’s no longer a GSoC project, Halsey is now actively looking for contributors.

Currently, the menu customizer is usable and offers the ability to assign menus to locations, edit existing menus/menu items, and add new menus.

Halsey outlined a roadmap for preparing the Menu Customizer for merge, which includes a number of PHP and Javascript development tasks, including, but not limited to, the following:

  • Build-out the core API for adding Customizer sections and controls entirely with JavaScript, #30741 and its related tickets (PHP, JS)
  • Drag and Drop menu item reordering needs to do sub-menus (code imported from nav-menus.php is commented out in menu-customizer.js currently) (JS)
  • Fix problems with previewing updates to menu items, and with previewing newly-added menus once items are added (JS)
  • Redo the add-menu-items “panel” to lazy-load its contents & utilize Backbone sub-views (PHP, JS)

He also hopes to improve the experience of using the customizer on mobile, followed by getting the menu customizer plugin to work on mobile. Halsey is also looking for contributors to assist on the design, code review, a backwards-compatibility audit, and inline documentation.

If you’re curious about how the Menu Customizer works, anyone is welcome to try the plugin and offer feedback. For the time being, it is compatible with WordPress 4.1 but may require 4.2-alpha down the road as it progresses.

Contributor interest is critical for the Menu Customizer to have a shot at inclusion in WordPress 4.2. If you can help in any way, jump in on theMake/WordPress Core post to volunteer.

from :http://code.tutsplus.com/tutorials/creating-child-themes-for-your-wordpress-theme-framework–cms-21933

[quote font=”verdana” font_size=”14″ font_style=”italic” color=”#474747″ bgcolor=”#F5F5F5″ bcolor=”#dd9933″ arrow=”yes” align=”centre”]This Demo Content Brought to you by Momizat Team [/quote]

this is tags and keywords : wordpress themes momizat Tutorial wordpress  templates

Categories
Nigerian News

Prevent Bruteforce Login Attacks on Your WordPress

We recently suffered a brute force login attack on one of my servers which was causing some sites to be unreachable and the server load was sky-high. After installing a logging script on the server we found out that the problem was caused on one installation of WordPress – hackers were using a script to try and guess the password of the admin account. After identifying the problem we were able to prevent this from continuing but not after some downtime to various websites resulting in a loss of income for my company.

In this post I’m going to talk you through a few methods to prevent this so the same doesn’t happen to you.

CHANGE ADMIN USERNAME

This is mentioned all the time, but it really is an important step – don’t use “admin” as your admin username, pick something unique for each site. This was the cause of the problem with my site, I had the admin username as admin so this was the main reason for the attack. Because the hacker knows the username is admin, they are half-way to getting the login details and can use a brute-force script to try many different passwords in combination with the username. If the username is something they don’t know, this type of attack is not really possible.

USING .HTACCESS

If you are using PHP hosting which most WordPress installations will do, you can use a .htpassword file and .htaccess to prevent anyone even loading your wp-login.php file unless they know the username and password to do so – this provides an extra layer of security as there is now two lots of username and passwords to access your WordPress admin area. This is fairly simple to setup, you will need to know the server path to your website which will be something like: home/website

First you need to generate a htpasswd, you can do that on this site. Enter a username, click “Generate Password” and then click “Generate htpassword content” and save the text from the right hand box as a file named .htpasswd ( with no extension ) and upload this to your hosting, outside the public_html directory.

Change “~/.htpasswd” to the location of your .htpasswd file and change “mysecretuser” to the username you chose when creating the htpasswd file.

LIMIT ACCESS TO YOUR ADMIN AREA BY IP ADDRESS

If you are the only person who needs access to your WordPress admin area and you have a static IP address, you can limit access to yourself only by adding a rule in an .htaccess file within your wp-admin directory. The code to use is :

# Block access to wp-admin.
order deny,allow
allow from x.x.x.x 
deny from all

Just change x.x.x.x for your actual IP address, which you can find out here.

RECOMMENDED PLUGINS

There are a number of plugins you can use which will further enhance your login security, as follows.

from : http://wplift.com/prevent-bruteforce-login-attacks-wordpress

[quote font=”verdana” font_size=”14″ font_style=”italic” color=”#474747″ bgcolor=”#F5F5F5″ bcolor=”#dd9933″ arrow=”yes” align=”centre”]This Demo Content Brought to you by Momizat Team [/quote]

this is tags and keywords : wordpress themes momizat Tutorial wordpress  templates

Categories
Nigerian News

Post with many images

Welcome to image alignment! The best way to demonstrate the ebb and flow of the various image positioning options is to nestle them snuggly among an ocean of words. Grab a paddle and let’s get started.

On the topic of alignment, it should be noted that users can choose from the options of None, Left, Right, and Center. In addition, they also get the options of Thumbnail, Medium, Large & Fullsize.

The image above happens to be centered.

The rest of this paragraph is filler for the sake of seeing the text wrap around the 150×150 image, which is left aligned.

As you can see the should be some space above, below, and to the right of the image. The text should not be creeping on the image. Creeping is just not right. Images need breathing room too. Let them speak like you words. Let them do their jobs without any hassle from the text. In about one more sentence here, we’ll see that the text moves from the right of the image down below the image in seamless transition. Again, letting the do it’s thang. Mission accomplished!

And now for a massively large image. It also has no alignment.


The image above, though 1200px wide, should not overflow the content area. It should remain contained with no visible disruption to the flow of content.


And now we’re going to shift things to the right align. Again, there should be plenty of room above, below, and to the left of the image. Just look at him there… Hey guy! Way to rock that right side. I don’t care what the left aligned image says, you look great. Don’t let anyone else tell you differently.

In just a bit here, you should see the text start to wrap below the right aligned image and settle in nicely. There should still be plenty of room and everything should be sitting pretty. Yeah… Just like that. It never felt so good to be right.

And just when you thought we were done, we’re going to do them all over again with captions!

The image above happens to be centered. The caption also has a link in it, just to see if it does anything funky.

The rest of this paragraph is filler for the sake of seeing the text wrap around the 150×150 image, which is left aligned.

As you can see the should be some space above, below, and to the right of the image. The text should not be creeping on the image. Creeping is just not right. Images need breathing room too. Let them speak like you words. Let them do their jobs without any hassle from the text. In about one more sentence here, we’ll see that the text moves from the right of the image down below the image in seamless transition. Again, letting the do it’s thang. Mission accomplished!

And now for a massively large image. It also has no alignment.

The image above, though 1200px wide, should not overflow the content area. It should remain contained with no visible disruption to the flow of content.

And now we’re going to shift things to the right align. Again, there should be plenty of room above, below, and to the left of the image. Just look at him there… Hey guy! Way to rock that right side. I don’t care what the left aligned image says, you look great. Don’t let anyone else tell you differently.

In just a bit here, you should see the text start to wrap below the right aligned image and settle in nicely. There should still be plenty of room and everything should be sitting pretty. Yeah… Just like that. It never felt so good to be right.

And that’s a wrap, yo! You survived the tumultuous waters of alignment. Image alignment achievement unlocked!

error: Content is protected !!
Exit mobile version